Mojo: Juju Service Orchestration distilled part 2
Tom Haddon
on 20 January 2015
In the previous post we introduced Mojo. Today we’re going to take a closer look at how it all fits together.
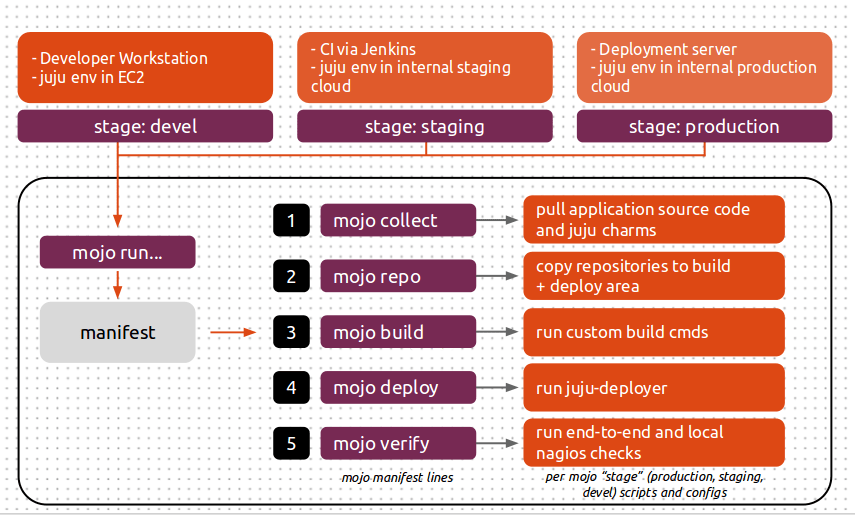
mojo run is the most often used command. As a refresher, here’s the diagram explaining how Mojo’s manifest can be used in different environments:
Mojo looks for a manifest file that defines the steps it should execute, and takes a --stage option, which tells it where to find the details of those steps. As an example, a manifest file might look like this:
collect
repo
build
deploy config=services-and-relations
verify
This tells Mojo that it needs to run a collect step, to gather resources (charms, and maybe other build artifacts), followed by a repo step to create the juju repository for deployment from the resources it downloaded in the collect step, followed by a build then deploy step and then a verify step. The details of what those specific steps involve will be defined in a directory with a name that matches the --stage option that we pass to the mojo run command.
A specification branch might look like this:
\_ manifest
\_ devel
   \_ collect
   \_ repo
   \_ build
   \_ services-and-relations
   \_ verify
\_ production
   \_ collect
   \_ repo
   \_ build
   \_ services-and-relations
   \_ verify
We can then run it with the --stage of devel:
mojo run --stage=devel
 - manifest:
     collect
       => collect resources as defined in "devel/collect"
     repo
       => create charm repository as defined in "devel/repo"
      build
      => run custom build commands per "devel/build"
     deploy config=services-and-relations
       => deploy using "juju deployer -c devel/services-and-relations"
     verify
       => run the "devel/verify" script
Or we can run it with a --stage of production:
mojo run --stage=production
- manifest:
    collect
    => collect resources as defined in "production/collect"
    repo
    => create charm repository as defined in "production/repo"
    build
    => run custom build commands per "production/build"
    deploy config=services-and-relations
    => deploy using "juju deployer -c production/services-and-relations"
    verify
    => run the "production/verify" script
The differences between the production and devel might be in the number of instances or the machine constraints you want for each service, for example.
In our example above, we might have the following in devel/services-and-relations (if you know juju-deployer, this may look familiar – Mojo uses juju-deployer to handle the actual deployment of services):
mojo-how-to:
  series: trusty
    services:
      mojo-apache2:
        charm: apache2
      mojo-gunicorn:
        charm: gunicorn
    relations:
      - ["mojo-gunicorn", "mojo-apache2"]
And then the following for production/services-and-relations we might have:
mojo-how-to:
  series: trusty
    services:
      mojo-apache2:
        charm: apache2
        units: 2
        constraints: cpu-cores=4 mem=4G root-disk=50G arch=amd64
      mojo-gunicorn:
        charm: gunicorn
    relations:
      - ["mojo-gunicorn", "mojo-apache2"]
By minimising the differences between these “stages”, but also making them directly visible in the specification branch, you allow developers and sysadmins to deploy and test services in exactly the same way, which makes for a much more repeatable process.
Mojo and Jenkins for continuous integration testing
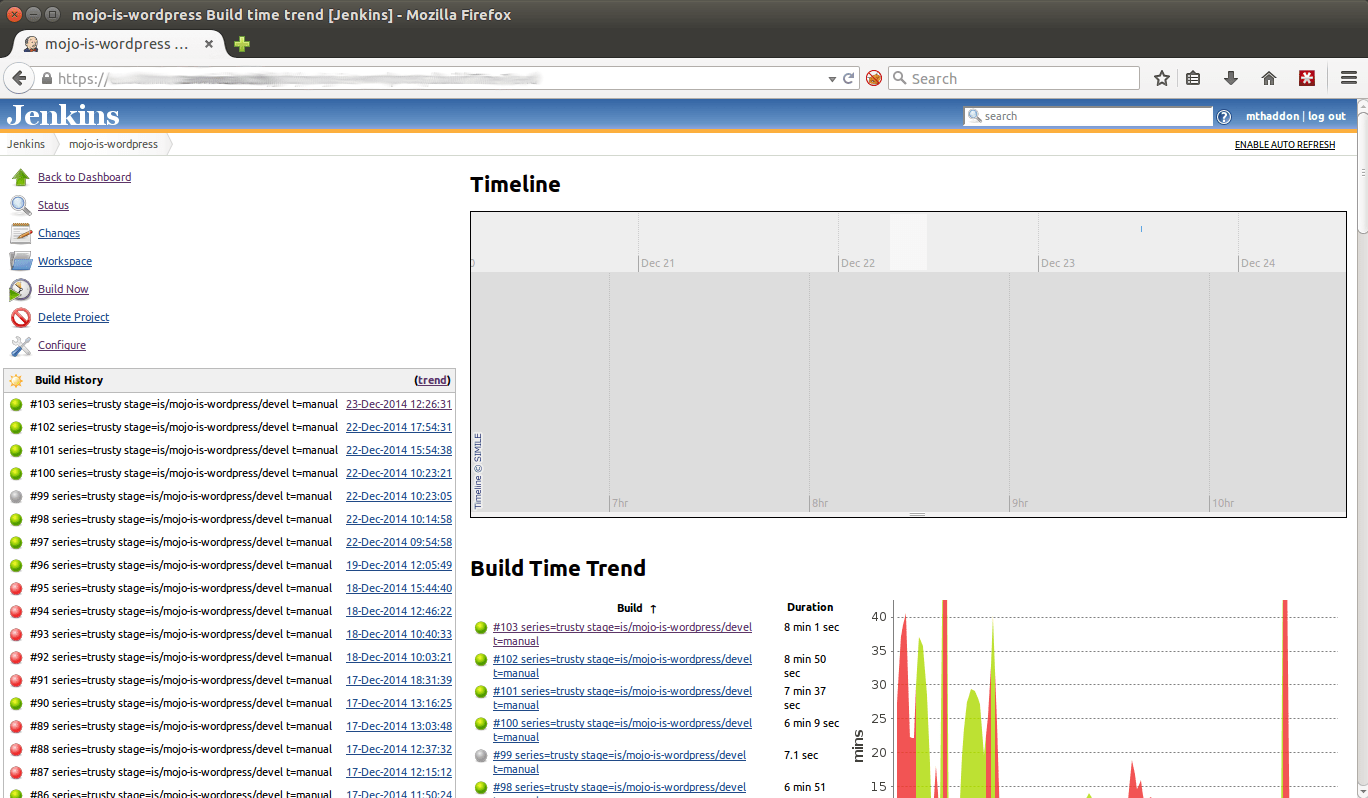
Mojo also includes some helper scripts for integrating it with Jenkins so that you can set up a means of kicking off Mojo for as many different services as you like. At Canonical we have Jenkins set up to deploy Mojo configured jobs into our production OpenStack instance so that we can verify particular specifications for services run by developers will work in our production cloud. This allows us to discover problems before they get to staging or production due to, for instance, egress firewalling on our production cloud which might not have been the case in the Juju environment developers were testing in.
Each job in Jenkins will spin up a new Juju environment, deploy the entire service stack and run anything else defined in the manifest, including any verification steps.
Mojo and service upgrades
The examples so far describe using Mojo to deploy an entire service from an empty Juju environment, albeit one that has been bootstrapped. But that’s not the only thing you can use Mojo for. Let’s look at how you would use Mojo to manage service upgrades.
If we have a service that get content updates via a juju set, we could add the following to our manifest file:
include config=manifest-content-update
We’d then put the following in manifest-content-update:
    script config=content-update
    sleep config=60
    verify
In devel/content-update (or production/content-update, depending on which “stage” we’re looking at) we might have:
juju set mojo-app-server content-version=27
What this means is that we’d deploy the service as normal, per the original lines in the manifest file, then we’d run the lines from the manifest-content-upgrade “sub-manifest”, which would run our juju set, sleep for 60 seconds to allow the service updates to happen, and then run the verify command to ensure the service is responding as expected after the update.
Let’s take a look at how this works. Here’s our specification branch:
\_ manifest
\_ manifest-content-update
\_ devel
   \_ collect
   \_ repo
   \_ build
   \_ services-and-relations
   \_ verify
   \_ content-update
\_ production
   \_ collect
   \_ repo
   \_ build
   \_ services-and-relations
   \_ verify
   \_ content-update
So now let’s try our mojo run:
mojo run --stage=production
- manifest:
    collect
    => collect resources as defined in "production/collect"
    repo
    => create charm repository as defined in "production/repo"
    build
    => run custom build commands per "production/build"
    deploy config=services-and-relations
    => deploy using "juju deployer -c production/services-and-relations"
    verify
    => run the "production/verify" script
    include config=manifest-content-update
      => run any steps defined in manifest-content-update, which are:
        script config=content-update
        => run the "production/content-update" script
         sleep config=60
        => sleep for 60 seconds
         verify
        => run the "production/verify" script
Why did we separate out this upgrade into a separate manifest file, and include it into main manifest rather than just putting those steps directly into the main manifest file? Because doing so allows us to run mojo run --manifest-file manifest-content-update which will only run the steps to update the content of the service, so we can run this command in isolation on production, once we’ve verified that it’ll work as expected from having run it as part of our end-to-end test that brought up the entire service and then did the content update when we ran mojo run.
mojo run --stage=production --manifest-file=manifest-content-update
- manifest-content-update:
    script config=content-update
    => run the "production/content-update" script
    sleep config=60
    => sleep for 60 seconds
    verify
    => run the "production/verify" script
In this article we’ve taken a look at Mojo manifests, we’ve seen how “stages” can be used to vary deployments in different environments such as development or production, we’ve seen how Mojo can be used with Jenkins to provide CI and we’ve talked about how it can be used to run service updates on existing Juju environments. Next time we’ll walk through the exact steps of an example deployment so you can see how Mojo works for yourself.
About the author
Tom Haddon is a squad lead within Canonical’s IS department. He manages a globally distributed team of senior systems administrators rotating between three functions: Projects, Operations and Webops (devops). He has a strong focus on cloud technologies including OpenStack, Juju and MAAS.
Talk to us today
Interested in running Ubuntu in your organisation?
Newsletter signup
Related posts
How to avoid package End of Life through backporting
When a Git vulnerability hit systems past Ubuntu package end of life, teams had to reassess security options. Learn how to stay protected beyond standard support.
Showcasing open design in action: Loughborough University design students explore open source projects
Last year, we collaborated with two design student teams from Loughborough University in the UK. These students were challenged to work on open source project...
Canonical Ubuntu and Ubuntu Pro now available on AWS European Sovereign Cloud
Canonical announced it is a launch partner for the AWS European Sovereign Cloud, with Ubuntu and Ubuntu Pro now available. This new independent cloud for...


