Unity 8 preview session in Ubuntu 16.10 Yakkety Yak
Will Cooke
on 13 October 2016
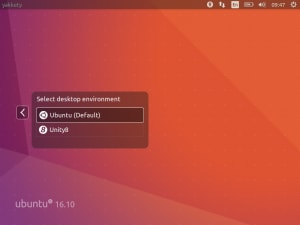
Ubuntu 16.10 Yakkety Yak has landed and brings with it the Unity 8 technical preview desktop session. Unity 8 has been the face of the Ubuntu phone and tablet for a few years and has quickly evolved its convergence feature set to allow it to work seamlessly between form factors such as phones, tablets and desktops. You can now chose to log in to a Unity 8 session directly from the greeter.
The current experience comes with a minimal set of applications; a browser, terminal and systems settings. Here are a few things you might like to try to flesh out your Unity 8 session and get the most from it.
Window Management
Unity 8 is designed from the ground up to work well with touch based displays. Try pressing three fingers on a window to open the touch friendly controls. You can move and resize windows with controls which work well for a touchscreen.
Enable More Scopes
Unity 8 ships with only the Apps scope enabled by default. There are many others installed and you can enable them by:
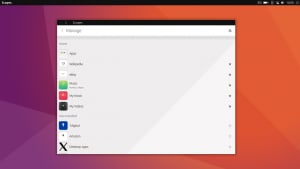
- Click on the up arrow at the bottom of the Apps Scope (or if you are using a touch screen drag it up)
- Browse the list of available scopes and enable them by clicking on the star icon
When you click the star you will notice the scope move to the top of the list in the Home section - When you are done you can return to the main scope by clicking on the left arrow next to “Manage”
- You can now swipe left and right between the scopes you have enabled
Enable Rich Multi-Media Scopes
You can browse and play your media directly from Scopes or launch the Media Player app. Make sure you have some supported media in your Music and Videos directories first.
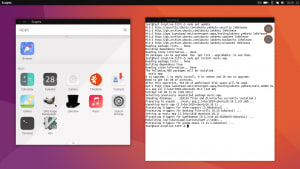
- Open the Terminal App and install the required software:
-
sudo apt install mediaplayer-app mediascanner2.0 unity-scope-mediascanner2 ubuntu-restricted-extras
- Open the Manage Scopes menu as in the previous step and enable the My Music, Music and My Videos scopes.
- The Media Scanner may take a few minutes to index your media. Try logging out and logging back in again if nothing appears in the Scopes.
- Scroll through to the Music scope and you should see your media complete with artwork where available.
- You can click play directly from the Scope to listen.
- If you have Videos available as well, scroll through to the My Videos scope, find a video and click Play. The Media Player app will open and play your video.
Add More Apps
It wasn’t possible to include all the Unity 8 core apps in the 16.10 image but you can easily install some additional apps as Snaps and from a PPA.
Snappy Apps!
These Snap apps are cutting edge and will be updated frequently. Because they are packaged as Snaps you will not be stuck with the version of the app which shipped with 16.10, they will be frequently updated and you will benefit from the freshest version as soon as they are available. (There is a known issue with Snaps opening two windows. This will be fixed soon.) Once you have installed the apps pull down the Apps Scope to refresh.
- Gallery App
-
sudo snap install --edge --devmode gallery-app
-
- Camera App
-
sudo snap install --edge --devmode camera-app
-
- Address Book App
-
sudo snap install --edge --devmode address-book-app
-
- Calendar App
-
sudo snap install --edge --devmode ubuntu-calendar-app
-
PPA Apps
You can also add this PPA to give you access to other Unity 8 apps which are built as .deb packages:
https://code.launchpad.net/~convergent-apps/+archive/ubuntu/testing
- To add the PPA open the Terminal app and run:
-
sudo add-apt-repository ppa:convergent-apps/testing
-
- Then run:
-
sudo apt update
-
- Music App
-
sudo apt install music-app
-
- Calculator
-
sudo apt install ubuntu-calculator-app
-
- Doc Viewer
-
sudo apt install ubuntu-docviewer-app
-
Enable Xorg dependent Applications
Unity 8 uses the Mir display server but many older applications need the Xorg display server to work. To support these applications you can install Libertine which will create a container to host the applications and Xmir to provide the Xorg display server. Install the Libertine packages from the archive by typing:
sudo apt install libertine libertine-scope libertine-tools
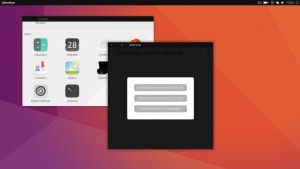
Once installed you will see the Libertine manager icon in the Apps Scope.
- Open Libertine and click on Install
- Leave the input boxes blank and click OK
- Wait while Libertine creates the container and installs the necessary packages. This will take a few minutes.
- Once this is complete click on the “Ubuntu ‘Yakkety Yak’” text and then click on the plus symbol

- Click “Enter package name” and enter “gimp” and click OK
- Wait while The Gimp is installed.
- Once complete you should see a Gimp icon in the Apps Scope, click on this and you’re running Gimp under Unity 8 and Mir.

Points to note
Mir runs on vty8, whereas Xorg runs on vty7. If you switch to a text console (e.g. vty1) and want to get back to your Unity 8 graphical session press ctrl-alt-f8.
Talk to us today
Interested in running Ubuntu in your organisation?
Newsletter signup
Related posts
How to avoid package End of Life through backporting
When a Git vulnerability hit systems past Ubuntu package end of life, teams had to reassess security options. Learn how to stay protected beyond standard support.
Showcasing open design in action: Loughborough University design students explore open source projects
Last year, we collaborated with two design student teams from Loughborough University in the UK. These students were challenged to work on open source project...
Canonical Ubuntu and Ubuntu Pro now available on AWS European Sovereign Cloud
Canonical announced it is a launch partner for the AWS European Sovereign Cloud, with Ubuntu and Ubuntu Pro now available. This new independent cloud for...


